Quick Start (UI First)
This quickstart is optimized for first success in the web UI. For service-to-service flows, use Integration Quickstart.
Prerequisites
Complete Installation first.
Success Checklist
By the end of this page, you should have:
- one saved rule
- one allowed outcome used by that rule
- one successful rule test in UI
- chart activity in Dashboard or Analytics, and configure spike notifications in Alerts
Step 1: Start Services
If you started with docker-compose.demo.yml or docker-compose.prod.yml, all services are already running — skip to Step 2.
Checkpoint:
http://localhost:8888/pingrespondshttp://localhost:4200loads login pagehttp://localhost:8025opens Mailpit inbox (for invite/reset email validation)
Step 2: Log In
- Open http://localhost:4200
- Sign in with your created user
- Confirm sidebar shows: Dashboard, Rules, Shadow Rules, Rule Rollouts, Labels, Outcomes, Analytics, Rule Quality, Alerts
Step 3: Create a Rule
- Open Rules
- Click New Rule
- Create:
- Leave Rule Lane set to Main rules
- Save
Checkpoint:
- Rule appears in rules list
- Rule detail page opens with Test Rule panel
Step 4: Ensure Outcome Exists
- Open Outcomes
- Add
HOLDif it does not exist yet - Save any changes
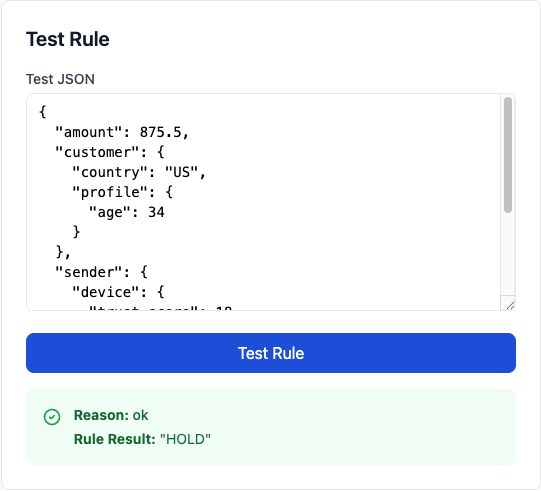
Step 5: Test the Rule in UI
- Return to the rule detail page
- In Test Rule, paste:
{
  "transaction_id": "txn_001",
  "effective_at": "2026-04-23T12:00:00Z",
  "event_data": {
    "amount": 15000,
    "user_id": "user_42"
  }
}
- Run test
Checkpoint:
- Test indicates outcome
HOLD
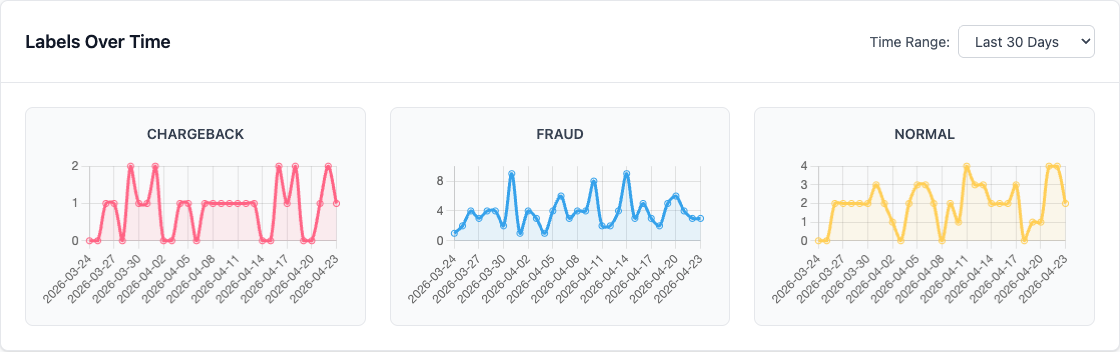
Step 6: Add Labels and Verify Analytics
- Open Labels
- Create the labels you want to use operationally (for example
FRAUD,NORMAL,CHARGEBACK) - Mark events or upload a small CSV from the Labels page
- Open Analytics
- Set the time range to Last 30 Days and check total labeled count and trend charts
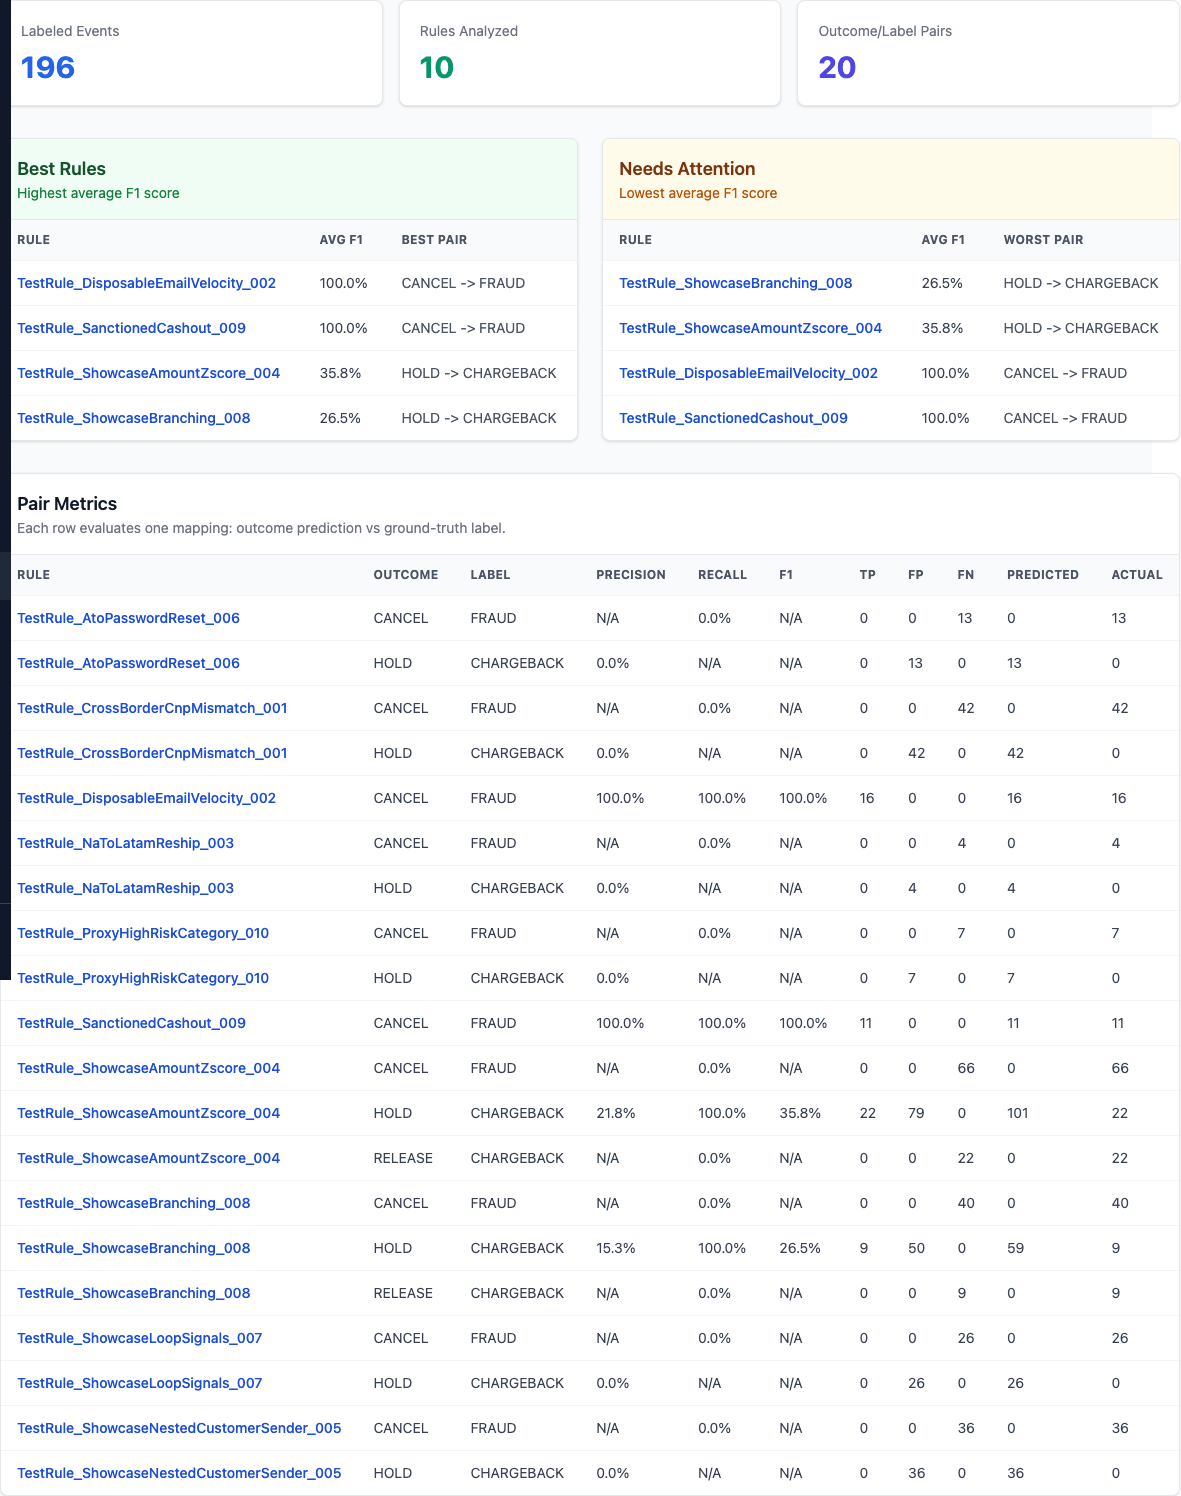
- Open Settings → General, add curated outcome→label pairs to track
- Open Rule Quality and confirm pair metrics load for curated pairs
You can also upload a small transaction_id,label_name CSV in Labels and recheck the charts.